Bare Metal Recovery - Disk Mapping
This project was designed and implemented at Intronis (now Barracuda) in 2014. It's included in my portfolio as an example of my ability to design within very tight constraints (built to live on a startup OS using only WinPE utilities).
Overview
As the sole UX designer on this project working closely with the lead PM, I designed a full stand-alone application to perform a bare metal restore of an image (backup of of the operating system and all the data associated with it, including the system state and application configurations) to similar or dissimilar hardware. This product allows users to boot a “bare metal” or new machine using a light version of a windows environment (WinPE) with our restore application attached. The project came with unique constraints as it was built using only the utilities available to WinPE, which has a maximum memory size of 512mb.
See the full (beta) application at work in a demo driven by the product manager (some UX adjustments were made following beta): https://www.youtube.com/watch?v=PIZt7uaqOEg&feature=youtu.be
Problem
The most complicated portion of the interface allowed users to map volumes backed up from the source machine to volumes on the disks of the target machine.
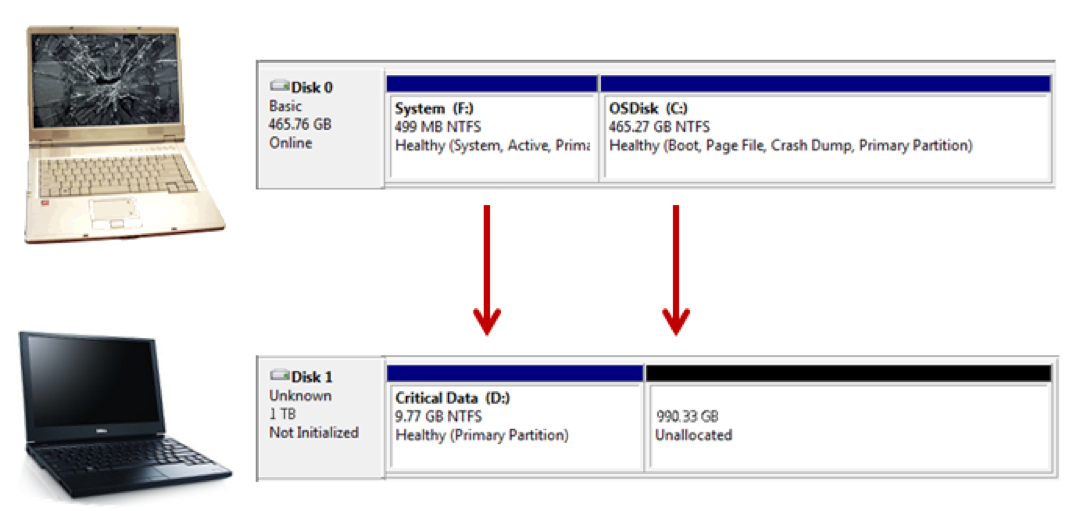
The easiest scenario to design for is when the target machine’s disks are empty and have enough space to house the source machine’s volumes:
Recovery to 'similar' hardware - Requires almost no interface. New disks can automatically be created to match the size and layout of the original disks.
Complication arises when the target machine contains data that the user does not want to delete. This requires the ability to re-size volumes, delete volumes, or create new volumes:
Recovery to dissimilar hardware - The user needs control to allocate disk space so data is not unintentionally overwritten
After testing our competitor’s products, I noticed that this step was often separated from the recovery wizard, and users had to perform the recovery one volume at a time. I wanted to collapse these steps into one to make it as quick and easy as possible for a user to go through the recovery wizard and boot their new machine from backup data.
Design 1
For early inspiration, I looked to the most recognizable interface for dealing with volumes/disks – the disk management interface native to windows. Our users are techs who work with these utilities regularly.
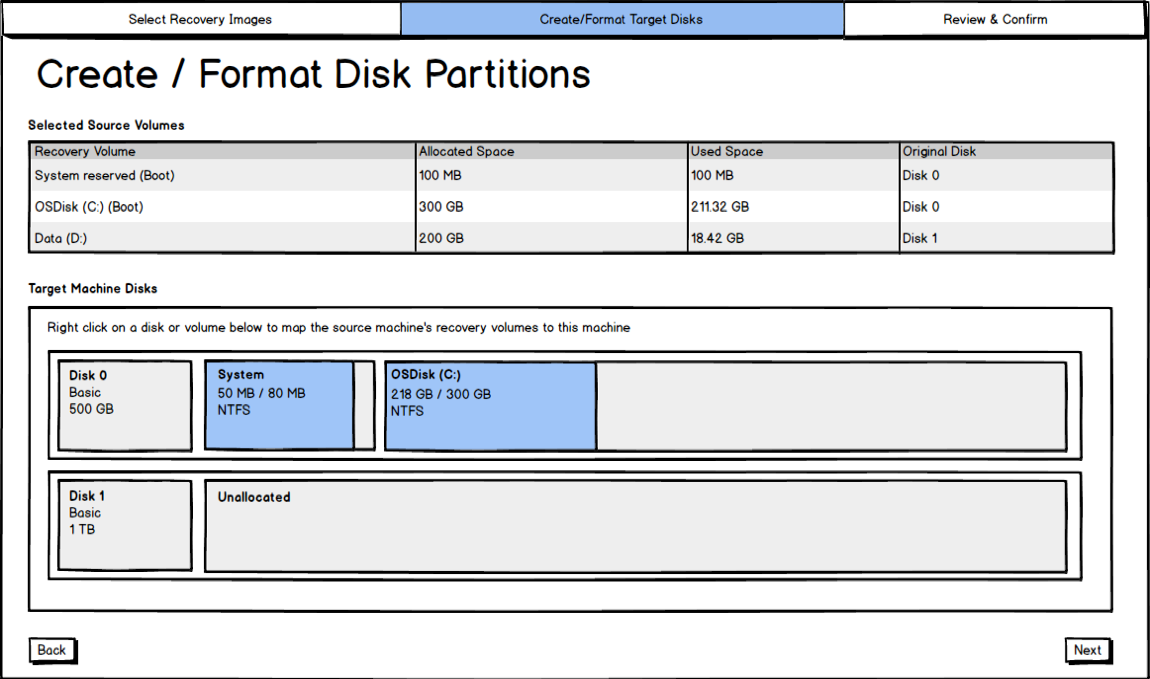
In this interface, users could see a visualization of the disks on their target machines. Here they could interact with them as they would in disk management – by right clicking. The right click menus would include options to extend, shrink, delete the volumes, as well as the ability to “map” a source volume to that space. As they mapped the volumes they would appear on the disk management layout and could be adjusted at will. This would give the user a real visualization of the changes they were making to their target machine.
An early concept, created with Balsamiq Mockups
This solution was going to be tricky to implement, so I created some alternatives that would give us the opportunity to test with users and make a good decision about the best approach.
Design 2
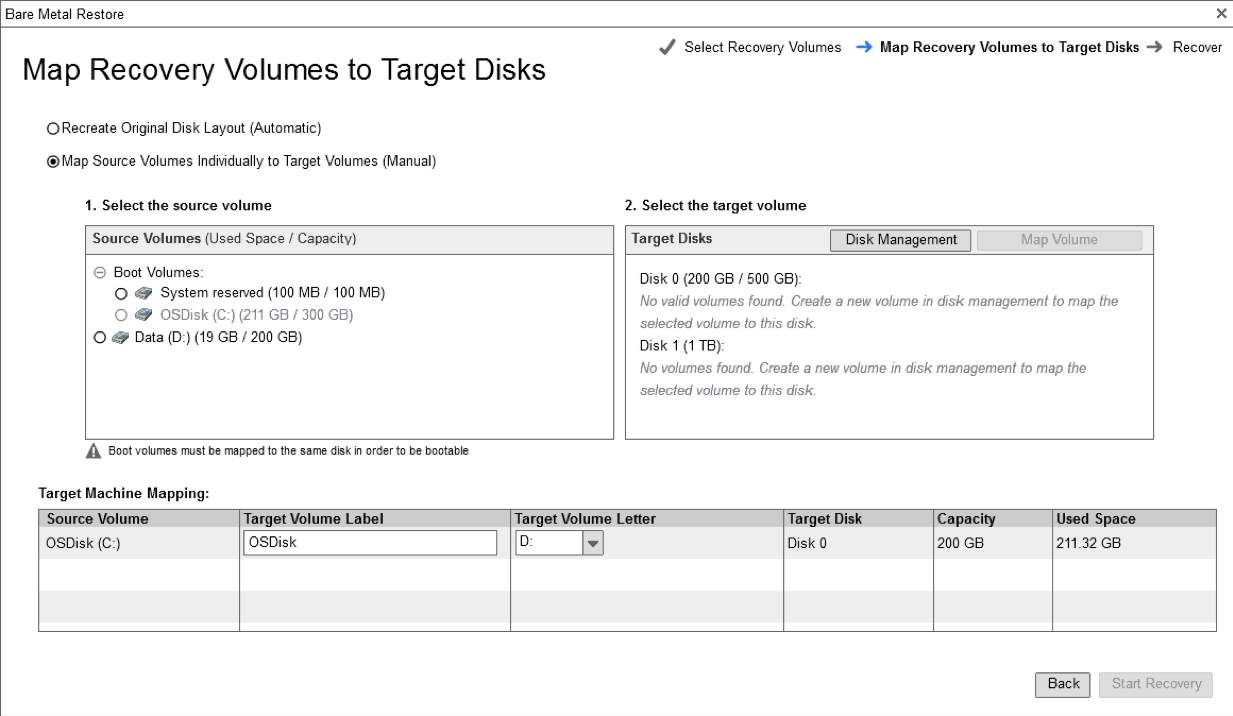
This design offers the easy option of “Recreate Original Disk Layout”, which would automatically handle the simplest and by far most common scenario, where a user is restoring to a new/blank, similar machine.
In the case that the user had to use the manual option, though, it is less of a picnic. Here the user is presented with steps using progressive enablement (I think I just made that term up), and the target machine’s mappings are displayed at the bottom as you make them. This option requires the user to open a separate disk management interface to delete or shrink or create volumes on the target disk.
Don’t worry if looking at this one confuses you – I am confused myself looking back at it. Of course nothing is implemented without testing.
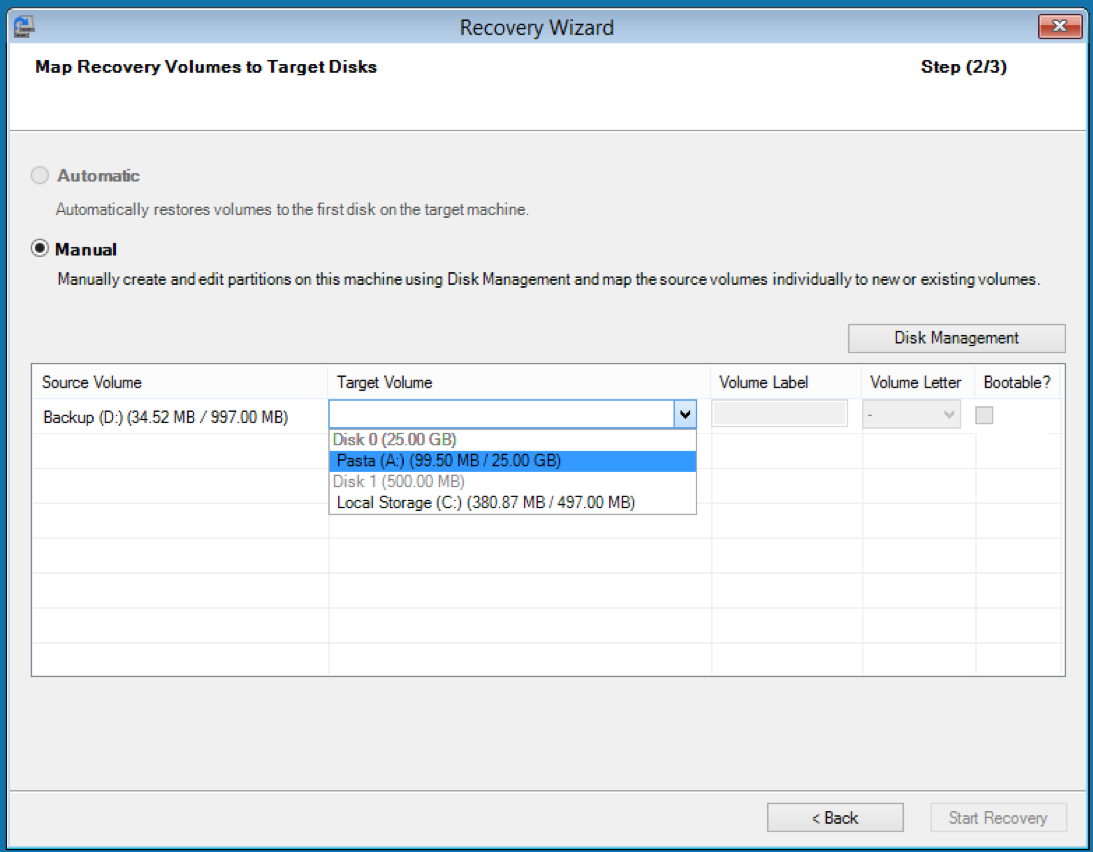
Design 3 (Final)
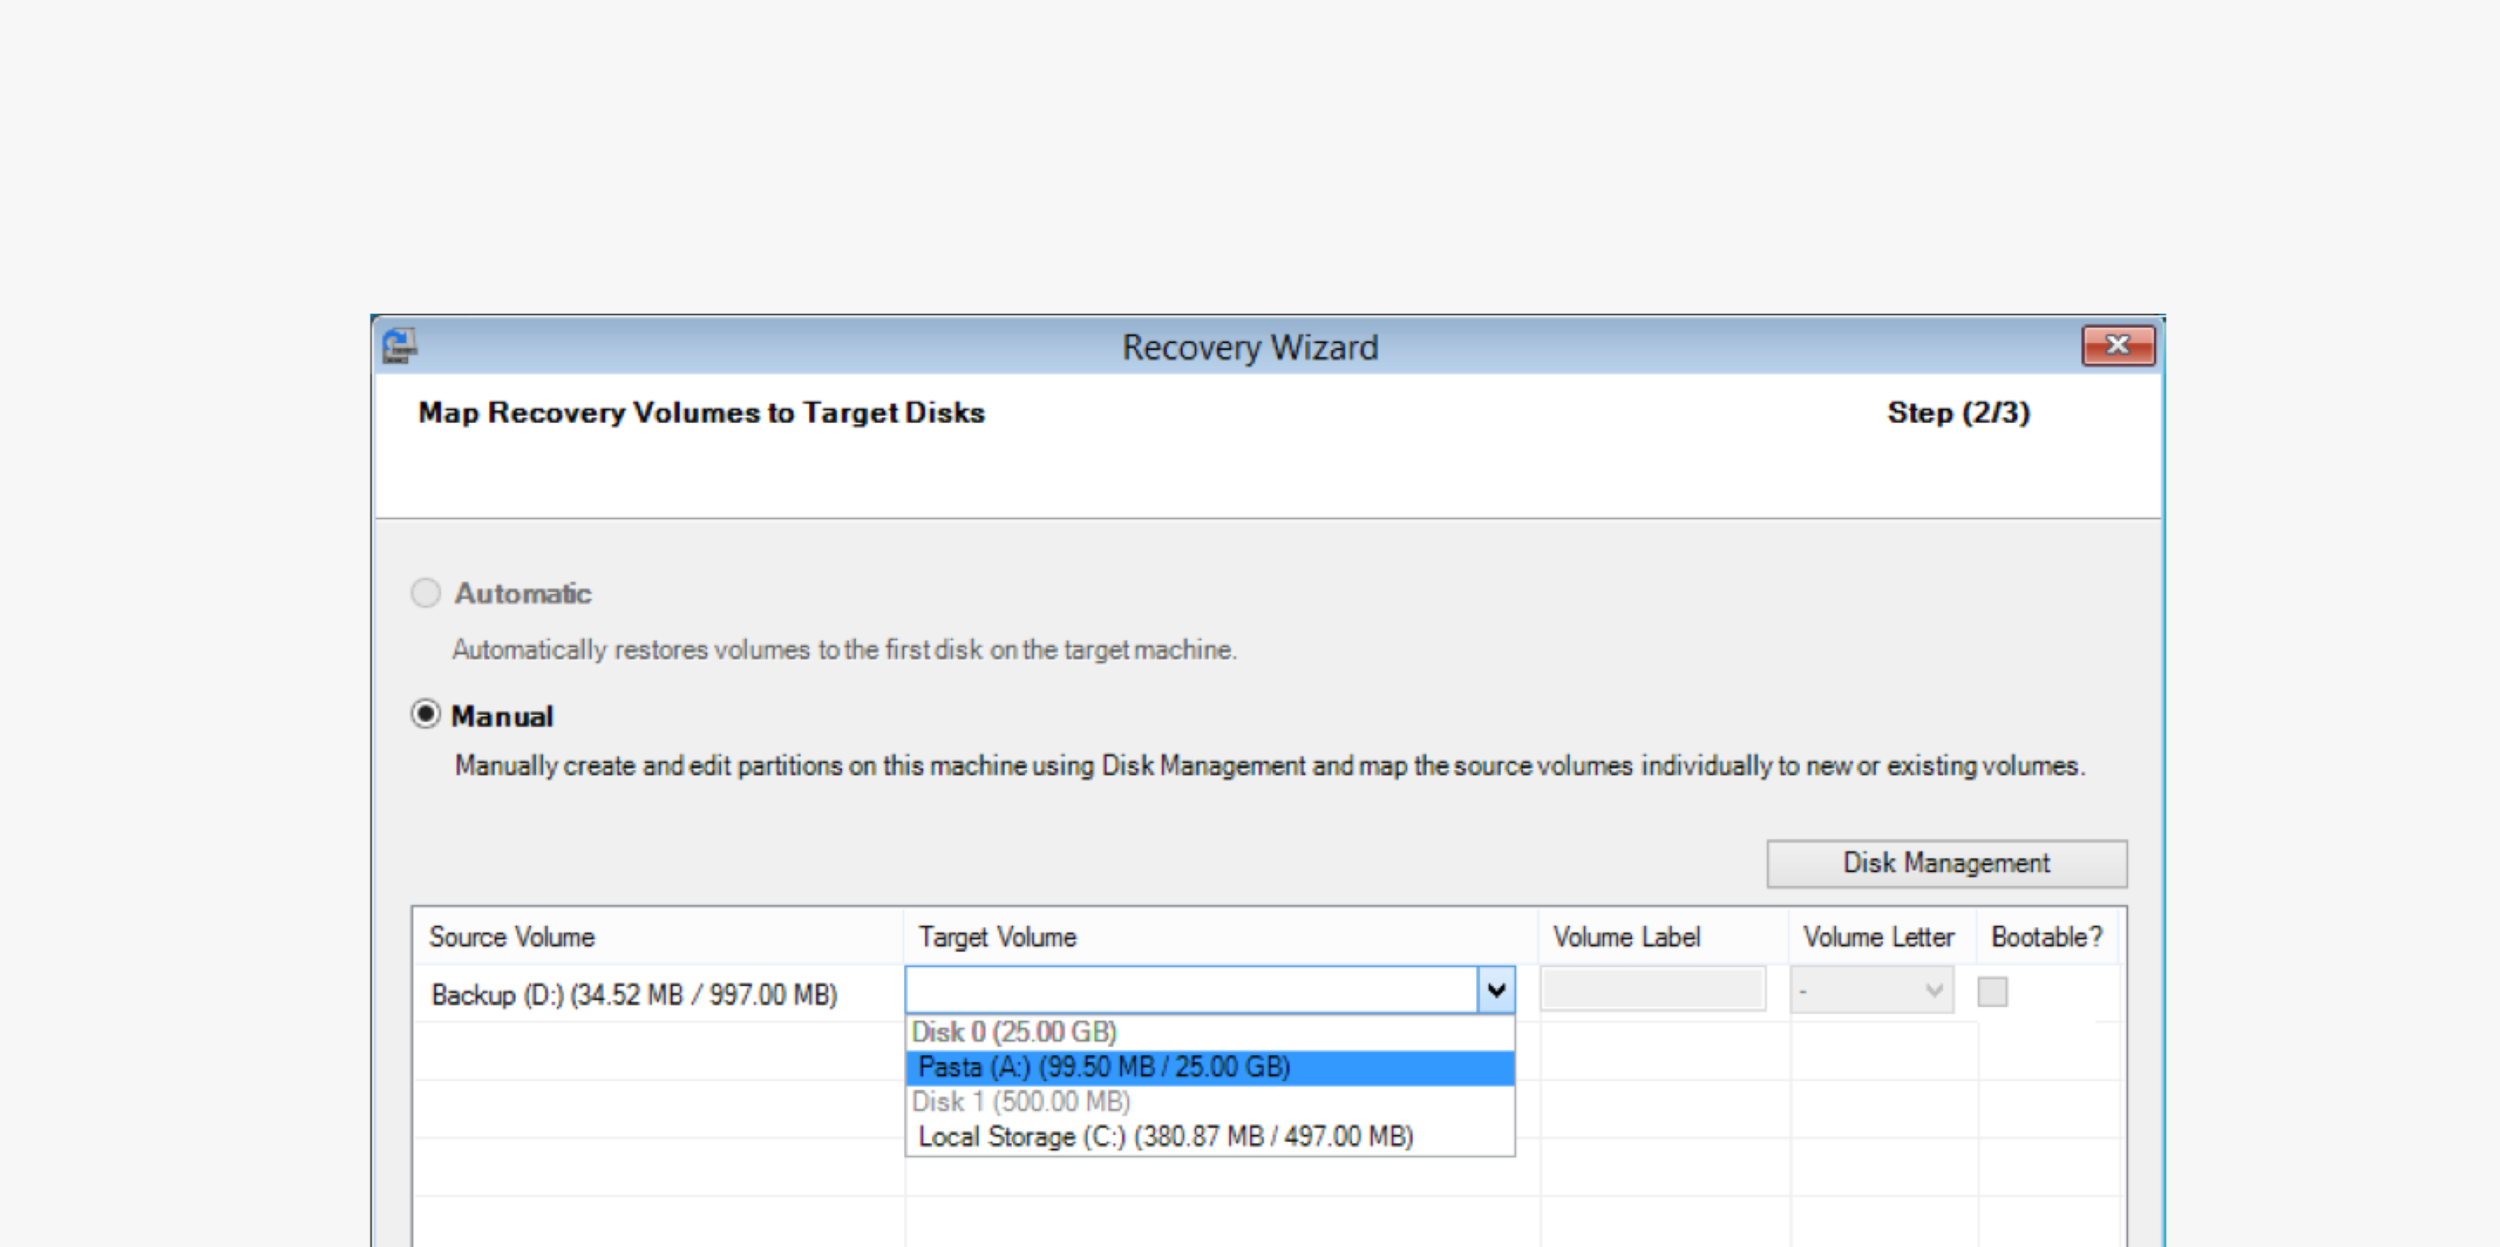
The third design ended up combining elements from the previous two designs to simplify the interface regardless of which option (manual or automatic) you must use. In the screenshot below, the automatic option is disabled (meaning my disk layout is different than from the source – a hover message would explain), so you must use the manual mapping option. Here I took just the table from design 2, and added a dropdown to choose the target volumes to map to. If the user needs to create volumes, they open disk management and create volumes as they would in windows. Then the option becomes available in the dropdown. We tested each of the three designs with 5 users in remote web sessions using clickable Balsamiq prototypes I created (in a randomized order). This design was chosen unanimously, and implemented. It was also the simplest solution for the development team to implement!
